In this micro-project we will learn how to use numpyto perform basic image manipulation.
To this end we will need to import three libraries: numpy, skimage for input/output functionality, and matplotlib for visualization.
import numpy as np
from skimage import io
import matplotlib.pyplot as plt
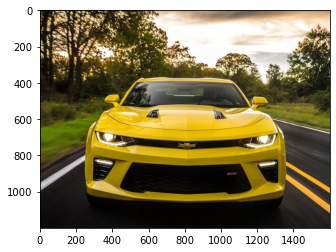
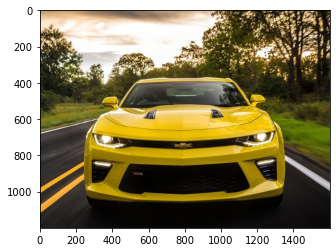
We will be using the poor yellow camaro shown above as a guinea pig for our manipulations…
Yellow is a very nice color to play with as it is mostly composed of green and red colors in the RGB scale.
But first things first. We need to import this .jpg image as something that can be interpretable by numpy and pyplot. To that end we will use the io.imread function. If we print out the output variable we obtain a 1200x1600x3 numpy array as shown below using the shape function.
camaro = io.imread("camaro.jpg")
print(camaro)
[[[ 83  81  43]
  [ 57  54  19]
  [ 34  31   0]
  ...
  [179 144 112]
  [179 144 114]
  [179 144 114]]

 [[ 95  93  55]
  [ 72  69  34]
  [ 46  43   8]
  ...
  [181 146 114]
  [181 146 116]
  [182 147 117]]

 [[101  99  61]
  [ 88  85  50]
  [ 67  63  28]
  ...
  [184 149 117]
  [184 149 117]
  [184 149 119]]

 ...

 [[ 12  10  11]
  [ 12  10  11]
  [ 12  10  11]
  ...
  [ 28  27  25]
  [ 27  26  24]
  [ 27  26  24]]

 [[ 12  10  11]
  [ 12  10  11]
  [ 11   9  10]
  ...
  [ 28  27  25]
  [ 27  26  24]
  [ 27  26  24]]

 [[ 13  11  12]
  [ 12  10  11]
  [ 10   8   9]
  ...
  [ 28  27  25]
  [ 27  26  24]
  [ 26  25  23]]]

camaro.shape
(1200, 1600, 3)
To visualize our input image we just need to use pyplot
plt.imshow(camaro)
Ok, now that we have our image loaded into memory we can play around with it. Let’s start by cropping the image!
Cropping
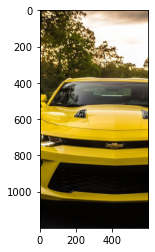
Let’s first do an horizontal crop. To do this,we slice the image using the indexes as shown below. The other dimensions do not change, hence the semicolon.
cropped = camaro[0:500,:,:]
plt.imshow(cropped)
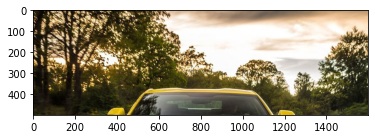
We can also perform a vertical crop…
cropped = camaro[:,400:1000,:]
plt.imshow(cropped)
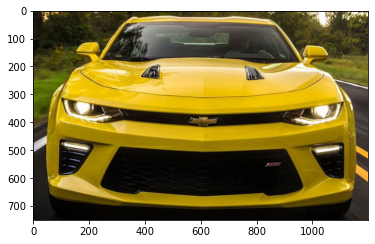
…and finally a crop that encompasses what we want: the camaro!
cropped = camaro[350:1100,200:1400,:]
plt.imshow(cropped)
Flipping
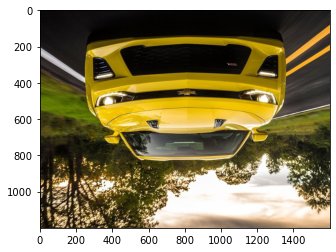
We can also easily flip our image.
To do a vertical flip we just need to invert the values in the horizontal direction as shown below.
vertical_flip = camaro[::-1,:,:]
plt.imshow(vertical_flip)
To perform an horizontal flip we do the same, but this time on the vertical direction.
horizontal_flip = camaro[:,::-1,:]
plt.imshow(horizontal_flip)
It looks similar but it is not! Look carefully!
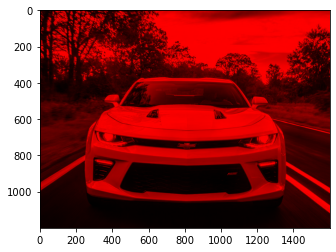
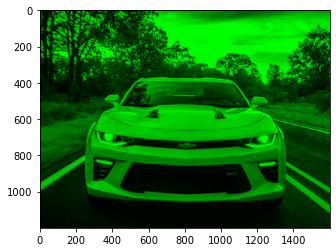
Color channels
As you’ve noticed we have three layers or dimensions in this image. The three layers are its RGB engoding, where R is red, G is green and B is blue.
The first layer is red…
red = np.zeros(camaro.shape,dtype="uint8")
red[:,:,0] = camaro[:,:,0]
plt.imshow(red)
…the second layer is green…
green = np.zeros(camaro.shape,dtype="uint8")
green[:,:,1] = camaro[:,:,1]
plt.imshow(green)
…and the third layer is blue!
blue = np.zeros(camaro.shape,dtype="uint8")
blue[:,:,2] = camaro[:,:,2]
plt.imshow(blue)
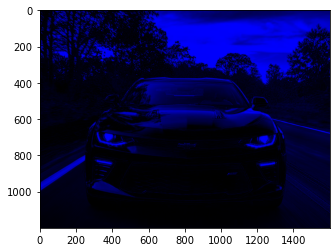
And we can observe that the yellow camaro almost has no blue in it, as expected!
Rainbow camaro!
To make it cool, let’s stack the red, green, and blue images together! We can use np.vstack for this.
camaro_rainbow = np.vstack((red,green,blue))
plt.imshow(camaro_rainbow)
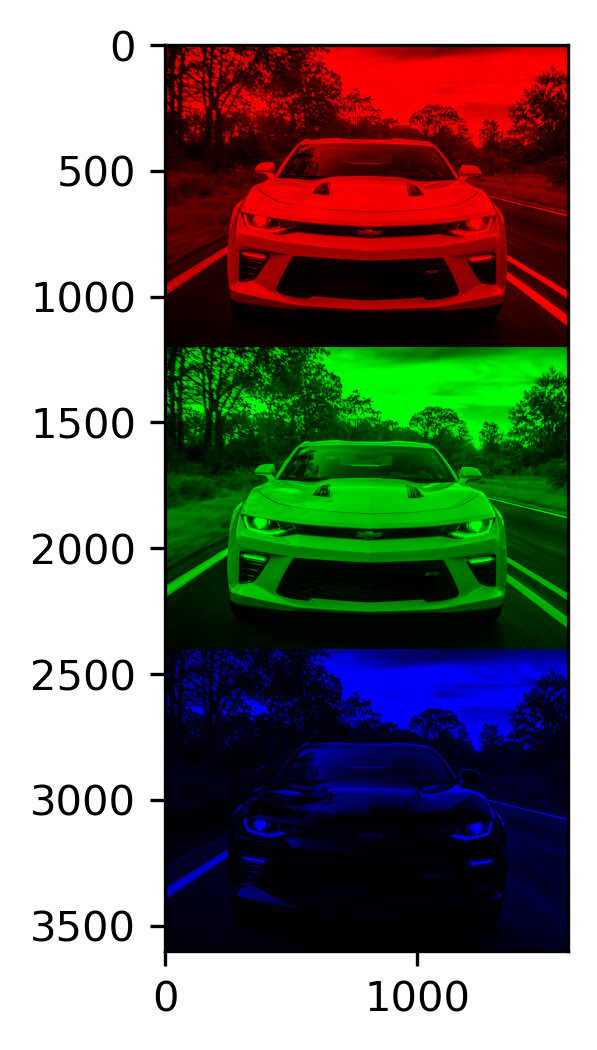
The image looks small but it is not!
Now, we just need to print it and hang it on the wall!
Safe travels! ;)
Image from wikimedia commons